前言 时隔很久,重新开始阅读源码的过程,因此找个相对比较简单的包remote-git-tags 进行阅读,并熟悉整套阅读流程(git subtree,vscode 中 nodejs 调试)
介绍 remote-git-tags 是一个只有 22 行的相对比较简单的包,他的主要作用就是获取仓库中的所有 tags
源码 Entry 老规矩,先看入口文件,index.js,(从 package.json 中的exports字段中可以找到)
1 2 3 ... "exports" : "./index.js" ,
源码比较简单,原理是通过运行 bash 命令:git ls-remote --tags repoUrl 获取 tags
(可点击git ls-remote 使用细节)
1
2
3
4
5
6
7
8
9
10
11
12
13
14
➜ git ls-remote --tags https://github.com/sindresorhus/got 67316ee37f0028d660f530970ab74a571247ff10 refs/tags/v0.1.0 1e7746d8c44a75ee9ec8ed94356dd5e8ba9c3bc2 refs/tags/v0.1.0^{} 1ec67ee5906c8b8e8fb849b925479a31707a404d refs/tags/v0.1.1 98d1263b1331573dbc6c3110addb038dc5804bb8 refs/tags/v0.1.1^{} 44c54b1b66f53d58c422c68c55c024827706a4b5 refs/tags/v0.2.0 32b0c033e26594a36b16ab7305e4ec5e54972cc1 refs/tags/v0.2.0^{} 6baafc7a29aa7a6a00bc818b0d100eb11268b943 refs/tags/v0.3.0 bc6987517edb1dfe54fc495f9b84a9df4b9f1f7c refs/tags/v0.3.0^{} 4274ba19113edb51f64fe5ab278b5d823b83155c refs/tags/v1.0.0 9a593acd8412f5e412f0e7e6044a88a5ea93ca90 refs/tags/v1.0.0^{} c0b6804510ac9105591ee338ff5ad0b0e395ac71 refs/tags/v1.0.1 37322366c7e85c898fbc9bf92bd32afa9a228aae refs/tags/v1.0.1^{} 4e736f374d7af685646b1184c06933c71c07ff99 refs/tags/v1.1.0
让我们来直接看代码:
1
2
3
4
5
6
7
8
9
10
11
12
13
14
15
16
17
18
19
20
21
22
23
24
25
import { promisify } from 'node:util' ;import childProcess from 'node:child_process' ;const execFile = promisify (childProcess.execFile );export default async function remoteGitTags (repoUrl ) { const { stdout } = await execFile ('git' , ['ls-remote' , '--tags' , repoUrl]); const tags = new Map (); for (const line of stdout.trim ().split ('\n' )) { const [hash, tagReference] = line.split ('\t' ); const tagName = tagReference .replace (/^refs\/tags\// , '' ) .replace (/\^{}$/ , '' ); tags.set (tagName, hash); } return tags; }
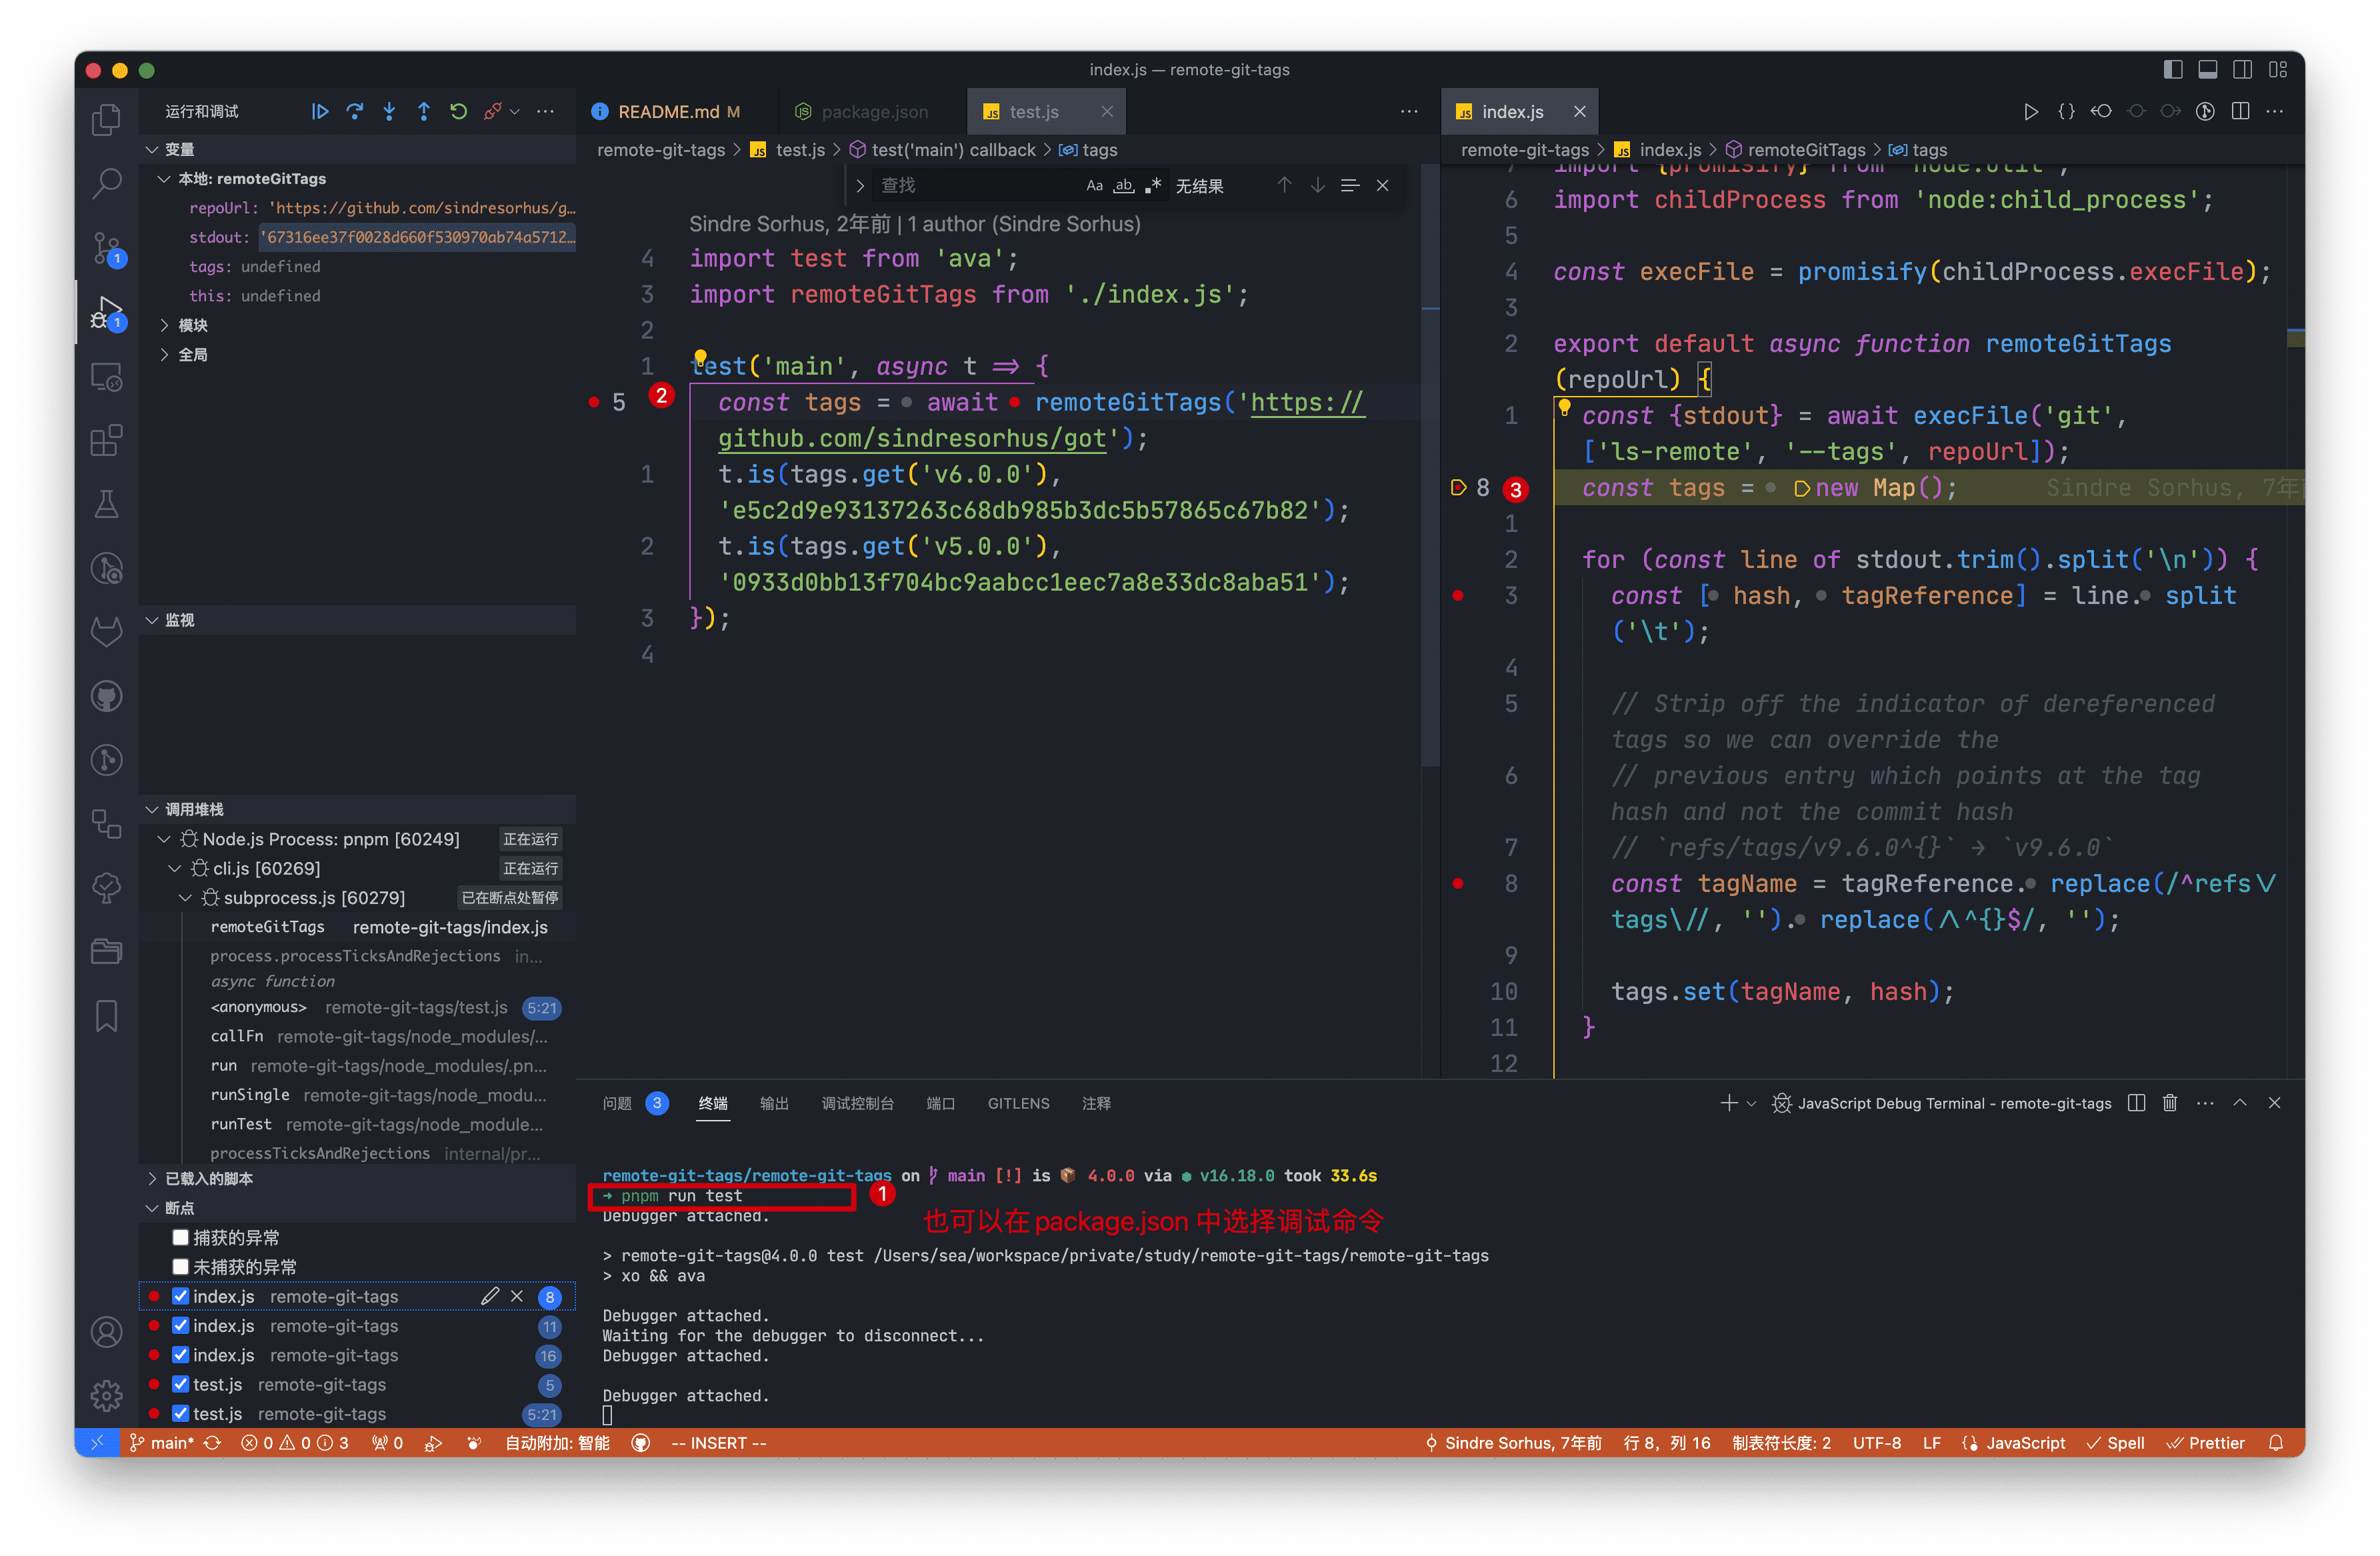
调试如图,我们可以看到相关代码对应的 debug 信息
Dependencies node:util 可以使用 node: 前缀来识别核心模块,在这种情况下它会绕过 require 缓存。例如,require('node:http') 将始终返回内置的 HTTP 模块,即使有该名称的 require.cache 条目。细节可查看官网
promisify 将常见的错误优先的回调风格的函数(也就是将 (err, value) => ... 回调作为最后一个参数),并返回一个返回 promise 的版本。
1
2
3
4
5
6
7
8
9
10
11
const util = require ('node:util' );const fs = require ('node:fs' );const stat = util.promisify (fs.stat );stat ('.' ) .then ((stats ) => { }) .catch ((error ) => { });
帮助理解,伪代码实现如下,真实源码可自行参考node 官网
1
2
3
4
5
6
7
8
9
10
11
12
function promisify (fn ) { return function (...args ) { return new Promise ((resolve, reject ) => { fn (...args, (error, value ) => { if (error) { return reject (error); } resolve (value); }); }); }; }
node:child_process execFile
child_process.exec(): 衍生 shell 并在该 shell 中运行命令,完成后将 stdout 和 stderr 传给回调函数。
child_process.execFile() : 与 child_process.exec() 类似,不同之处在于,默认情况下,它直接衍生命令,而不先衍生 shell。child_process.fork(): 衍生新的 Node.js 进程并使用建立的 IPC 通信通道(其允许在父子进程之间发送消息)调用指定的模块。
child_process.execSync(): child_process.exec() 的同步版本,其将阻塞 Node.js 事件循环。
child_process.execFileSync(): child_process.execFile() 的同步版本,其将阻塞 Node.js 事件循环。
总结 多看源码,多思考 🤔~
参考链接