如何使用Github Action 自动 lerna publish
本文讲述的是如何利用Github Action自动化执行 lerna publish。
动机
大家都明白,人是很懒的,自从接触到Github Action后我就在想,能不能解放自己的双手,让 Github 帮我来自动发包至 npm 仓库。由此引出了本文。
假设你对 Github Actions 已经有了最基本的了解。如果不太了解,可以参考往期文章:github-actions入门,
比如,你知道下面这个配置表示当 push 到 master 分支时会触发 action,作用是在 ubuntu 环境中把代码 checkout 出来,然后使用 node 14.X 先后执行 npm i 和 npm run test。
1 | name: test |
那么接下来照葫芦画瓢开始针对publish 进行针对操作。
如何设置
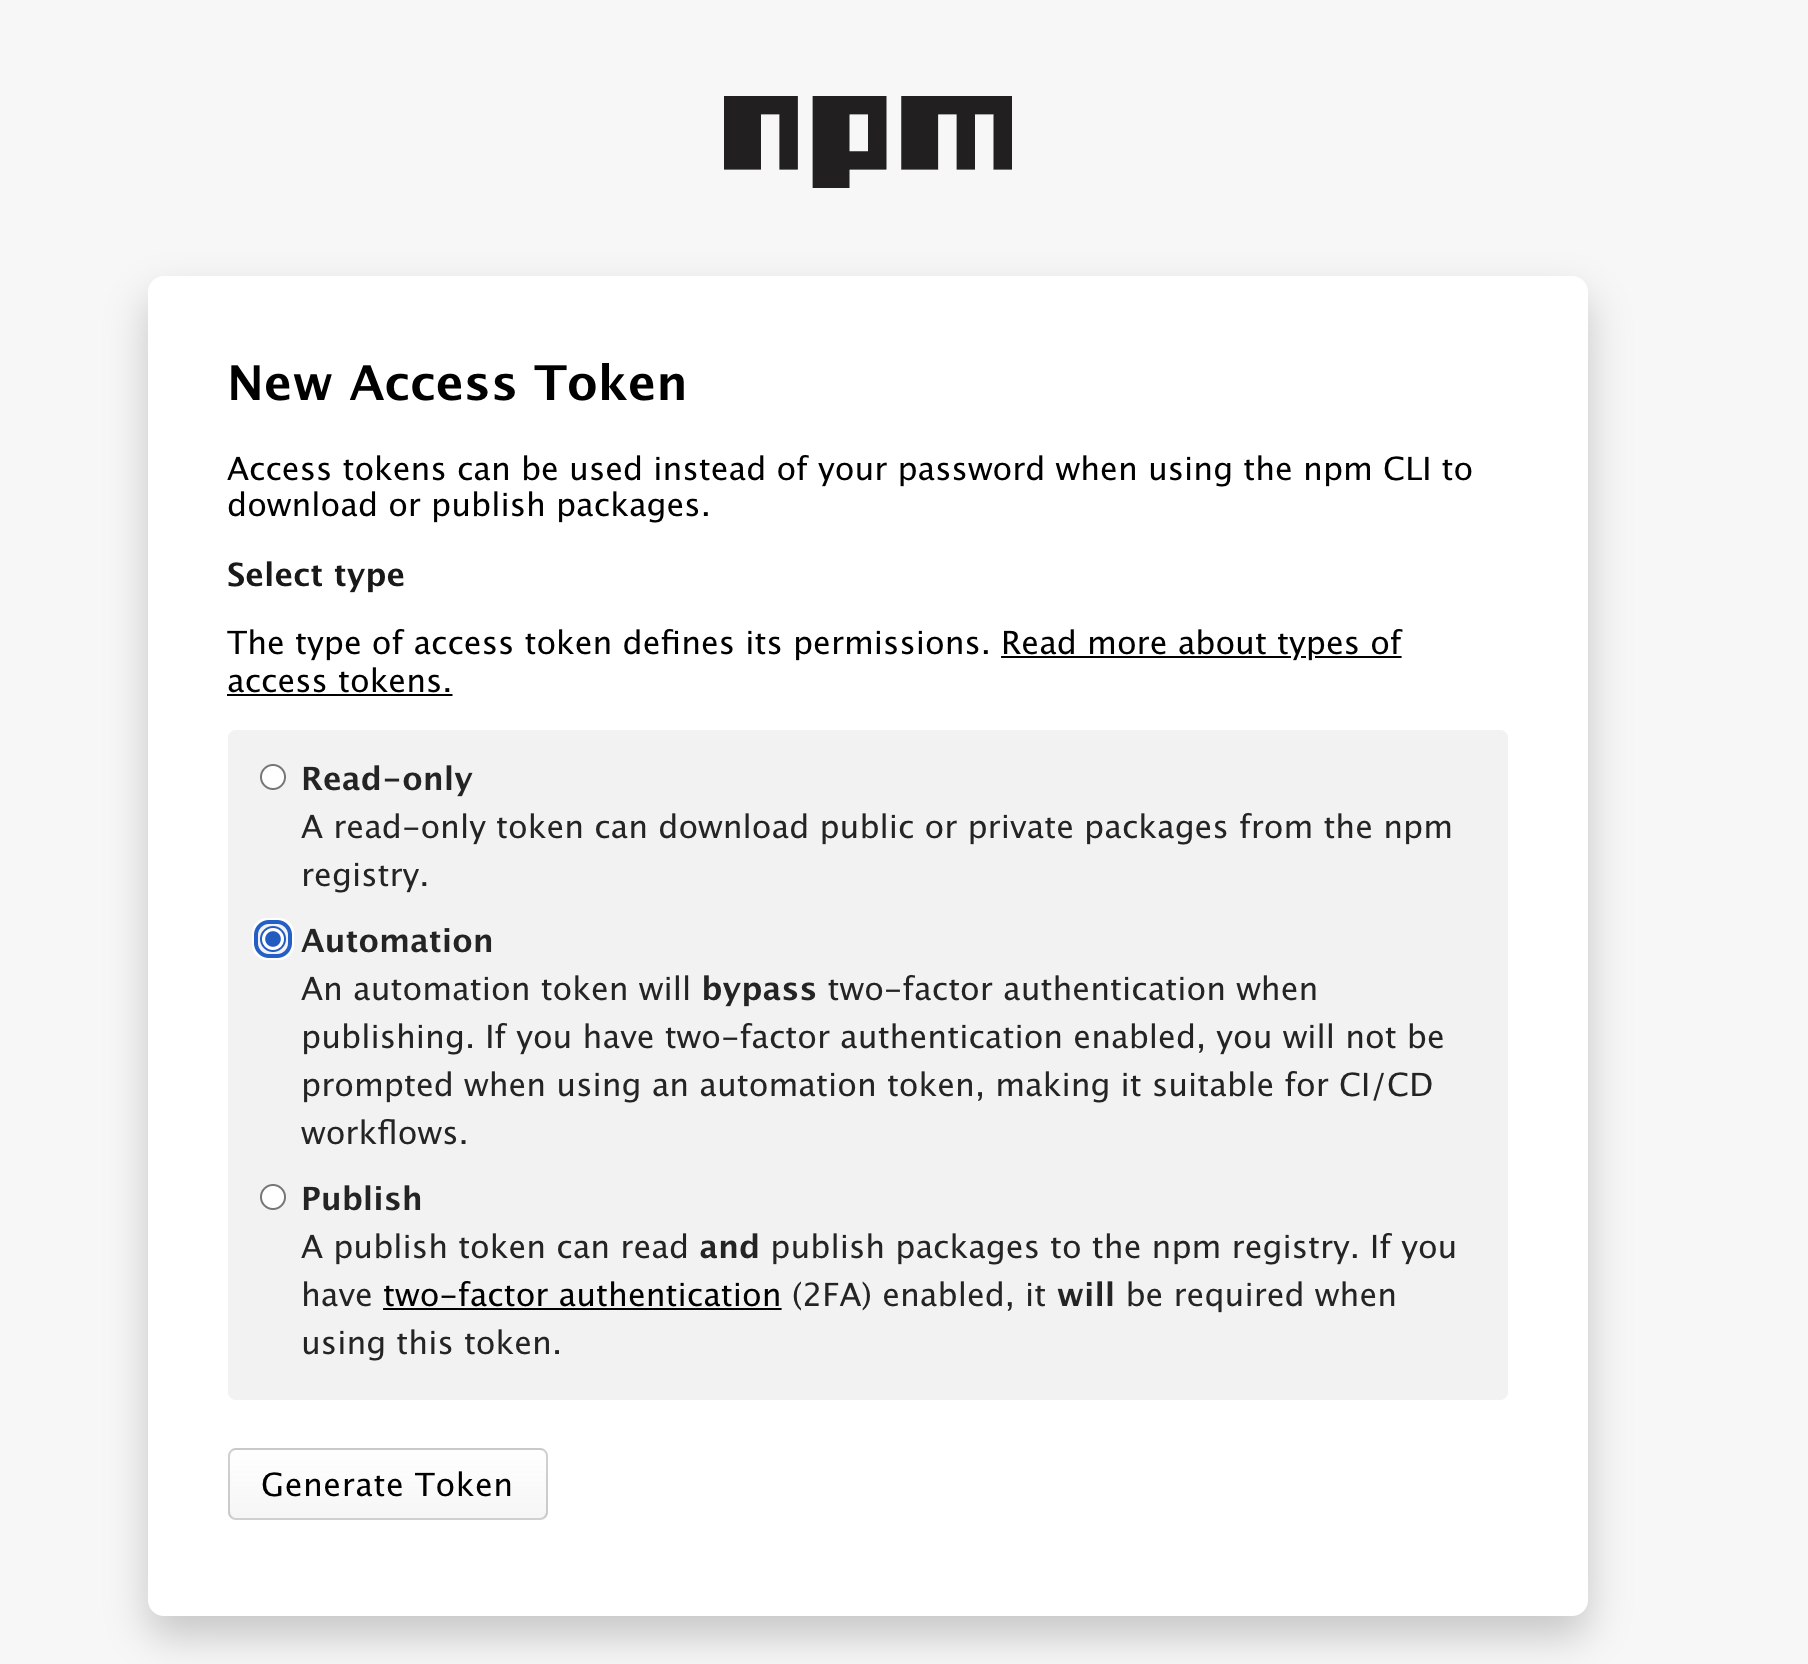
准备 Npm Token
我们都知道,以往在发布 npm 包的时候,我们需要先运行 npm login 登录我们自己的账号,用来验证我们的身份,使用 Github Action 也要验证我们的身份,不过需要用另外一种方式—>使用 npm token。
登录 npm 后,找到个人中心菜单里面的 “Access Tokens” 菜单,然后点击右上角的 “Generate New Token” 生成 token 按钮,生成一个新 token ,然后把新 token 复制出来,我们后面步骤要用到。
注:npm access token 有三种,但既有 publish 权限且可绕过 2FA 的只有 automation token。
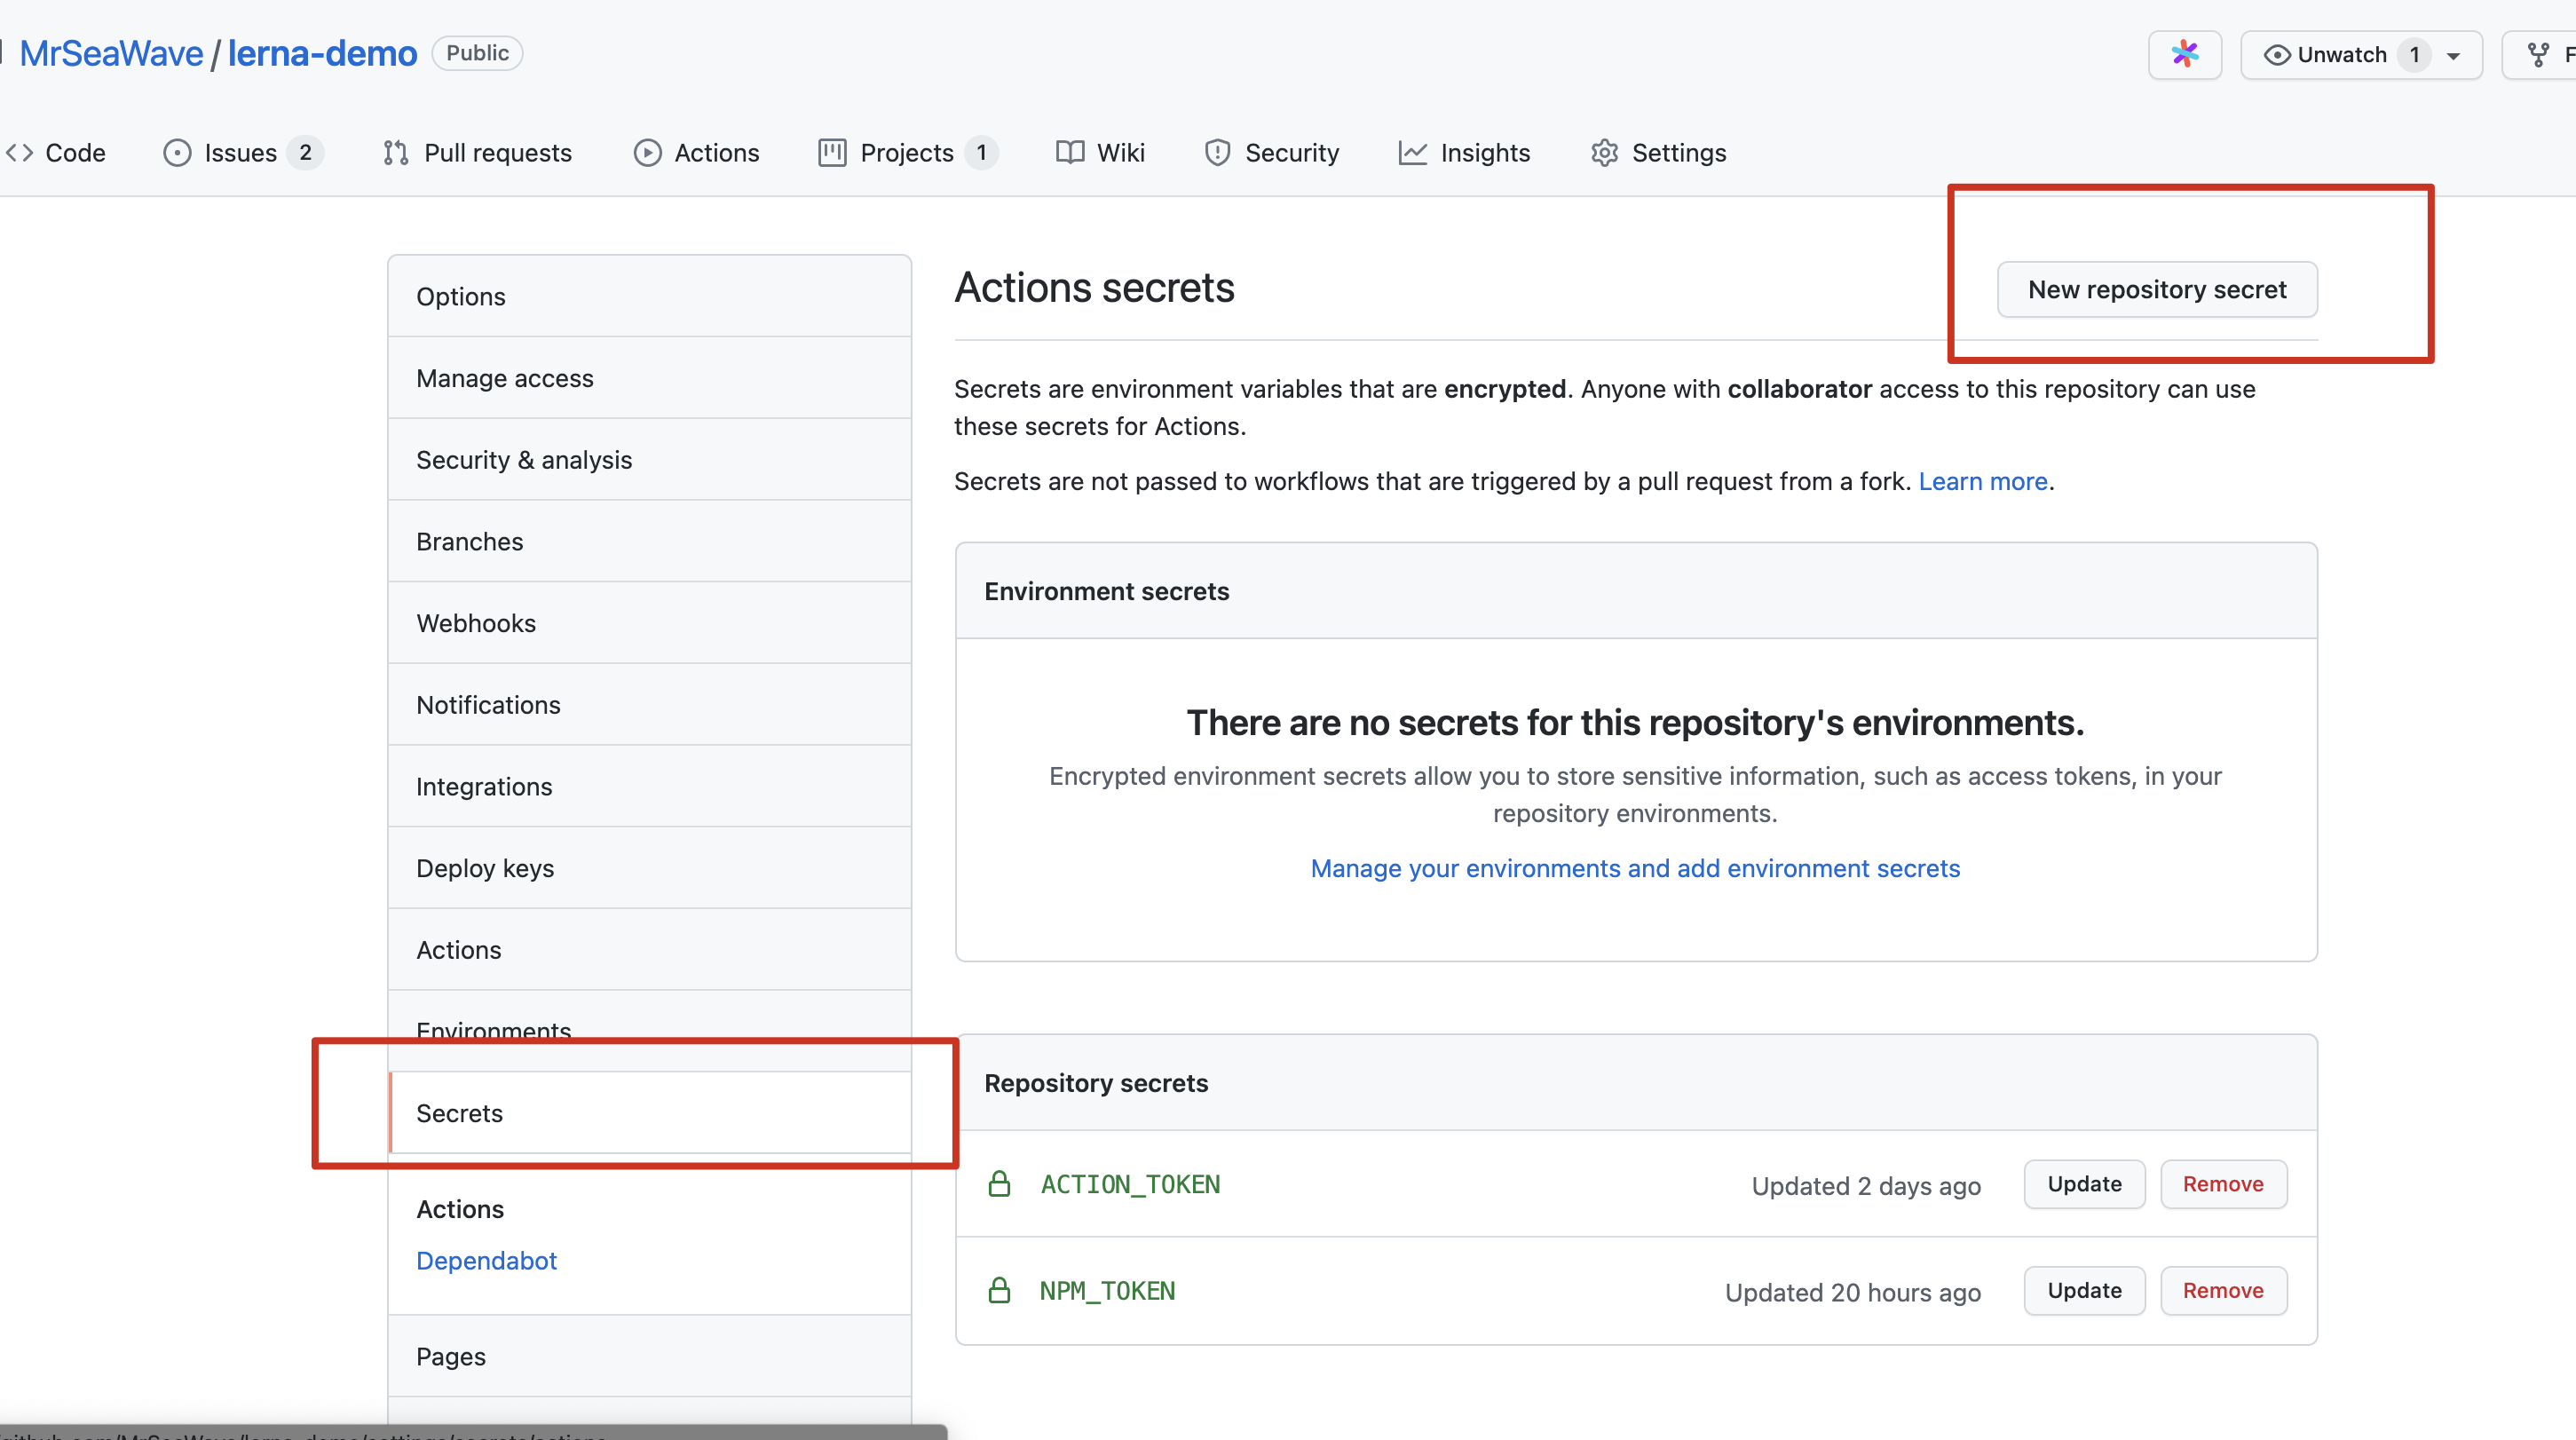
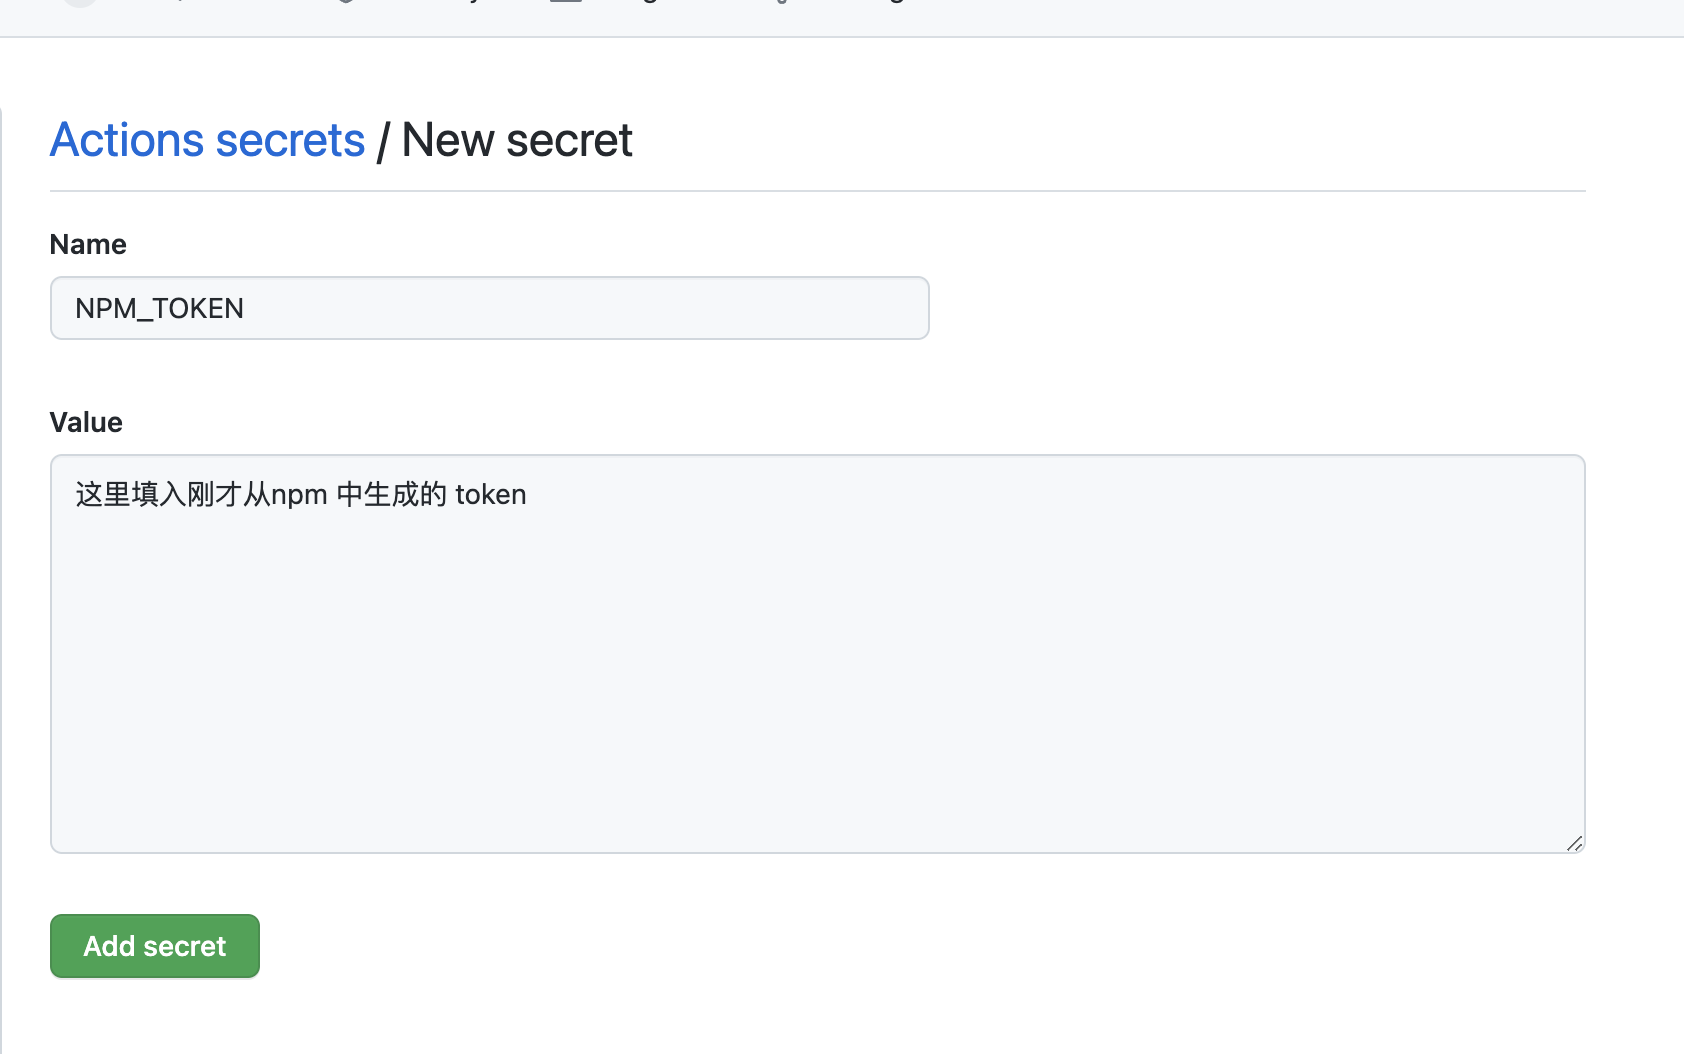
放置 Npm Token
找到你的 Github 项目,然后点击 Setting 选项,如图:

然后在左侧菜单中找到 Secrets ,在点击 New repository secret 按钮,创建一个新的秘钥,这里的 name 起名为 NPM_TOKEN,下面要用到,value 则是刚才 npm 中生成的 token, 如图,
设定针对 CI 使用的 npm scripts
以下为 package.json 中的scripts设定:
1 | { |
- 通常在发布之前会进行打包,所以这里把
build脚本放在一起来使用。- Lerna 在使用 npm 的 automation token 会遇到问题,必须使用
--no-verify-access绕过。详情参考 issue。
设定 Github Actions
前置条件已经完成,那么我们就可以在我们的本地项目中,创建 .github\workflows\auto-publish.yml 文件,内容如下:
1 | # 自动发布 |
到这里就全部设定完毕了。接下來只需要:
- 在 master 上修改指定文件夹代码,并 push。
- 触发 Github Actions 的 auto-publish job,它会运行脚本自动发布至 npm。
可能你会有如下的疑问,lerna publish 后也会修改代码(如:package.json 修改),并 push 到 master,那么会不会在这个脚本上一直套娃,无限循环的运行呢?
答案是不会的,官方解释如下:

参考链接
如何使用Github Action 自动 lerna publish
https://hailangya.com/articles/2021/12/16/github-actions-auto-publish/